How to print two colours with one nozzle (filament change)
Updated 19 November 2026
Design the colours as layers stacked by height, so each new colour starts above the last, such as raised letters on a plate, then pause at the first layer of the new colour and swap filament. In Bambu Studio or OrcaSlicer, slice, drag the preview's layer slider to that layer, right-click its + and add a filament change. ScadBox's Print Check and its pause_plan tool tell you which layer it is.
What works with one nozzle
A printer with one nozzle and no multi-material unit prints one filament at a time, but you can change it partway through. Everything printed after the change is the new colour. So colours can change by height: a dark plate with light letters standing on top, a keychain with a coloured face, a coaster with a contrasting top layer.
What doesn't work is two colours side by side on the same layer, such as text inlaid flush with the surface. That needs a multi-material printer or separate parts glued together. ScadBox warns when a model has colours side by side at the same height.
Design it in OpenSCAD
The trick is to make the second colour start exactly where the first ends. ScadBox's name sign example does it by putting the letters on top of the plate, starting at the plate's thickness:
/* [Text] */
// The text on the sign
label = "Ada";
// Height of the capital letters
text_size = 18;        // [6:1:60]
// How far the letters stand up from the plate
letter_h = 1.2;        // [0.4:0.2:4]

/* [Plate] */
// Width of the plate
plate_w = 100;         // [40:1:250]
// Thickness of the plate
plate_t = 3;           // [1.6:0.2:8]

/* [Colours] */
// Colour of the plate
plate_color = "#1E2A3A";
// Colour of the letters
letter_color = "#F4F4F6";

module plate(w = plate_w, h = text_size * 2, t = plate_t) {
    color(plate_color) translate([-w / 2, -h / 2, 0]) cube([w, h, t]);
}

module letters(z = plate_t) {
    color(letter_color) translate([0, 0, z])
        linear_extrude(letter_h)
            text(label, size = text_size, halign = "center", valign = "center");
}

plate();
letters();
echo(colour_change_z = plate_t);
The color() calls are what ScadBox and the slicer read. Keep colours as hex-string parameters, and ScadBox's customizer gives each one a colour picker.
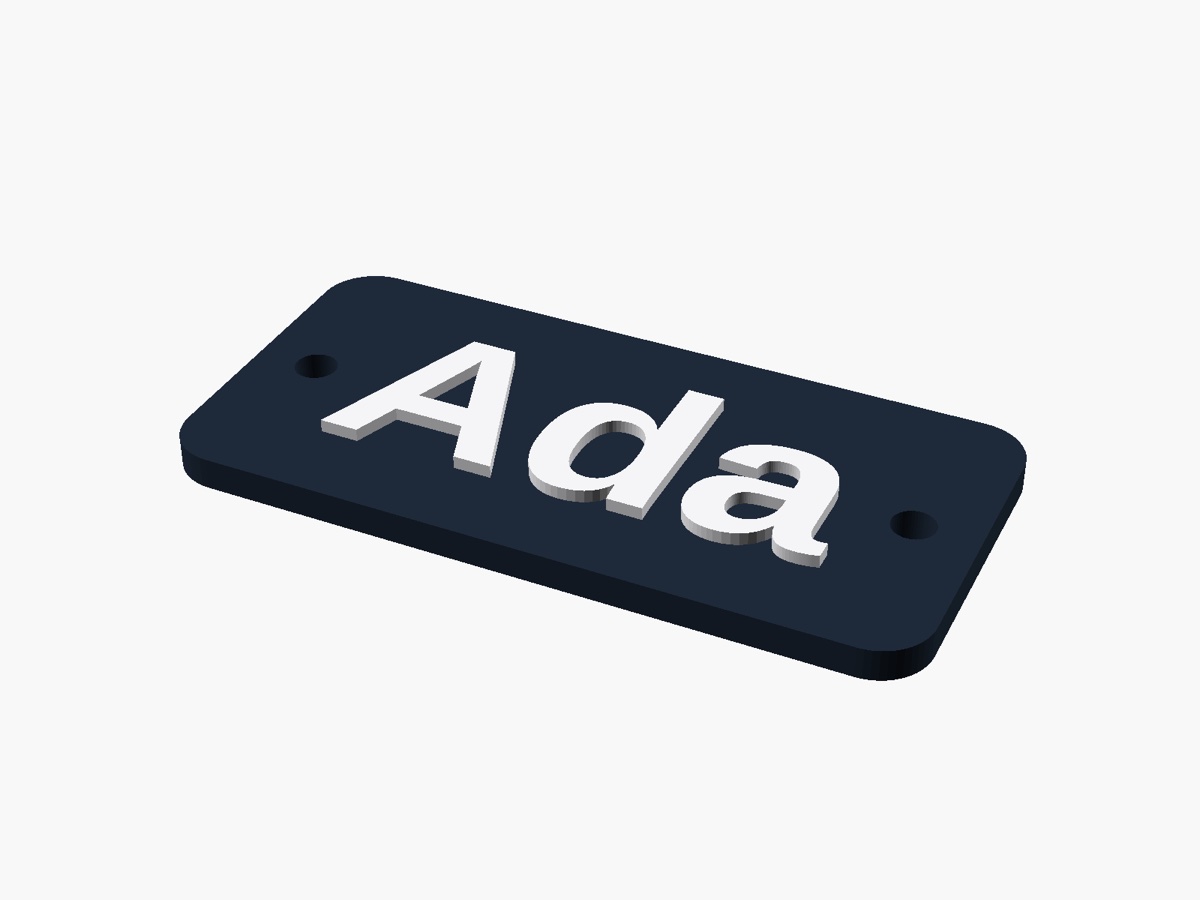
Work out the layer
The change goes before the first layer of the new colour. With a 0.2 mm first layer and 0.2 mm layers after it, a 3 mm plate ends at the top of layer 15, so the letters start on layer 16, from 3.00 to 3.20 mm. In general, with first layer f and layer height h, the layer starting at height z is (z − f) / h + 2.
Make the change height land on a layer boundary. A 3.1 mm plate with 0.2 mm layers puts the change in the middle of a layer, so that layer holds both the top of the plate and the bottom of the letters and can only be one colour. Choose plate thicknesses that are a whole number of layers, or let a tool check it for you.
Let ScadBox find it
In the app, Design › Print Check (⌥⌘P) has a Pauses section that lists each colour change with its layer, and draws a translucent plane at that height on the model. See checking a print before slicing for the rest of Print Check.
AI agents use the pause_plan tool. It reads the colour bands from the rendered model (or takes the heights you give it), and returns the layer numbers and heights, which filament to start with, a warning when a change height isn't on a layer boundary, and how to add the pauses in the slicer. For the sign it says, in short:
Layers: first 0.20 mm, then 0.20 mm (match these in the slicer).
• Change filament before layer 16 (3.00–3.20 mm): the new colour starts at 3.00 mm.
Set the same first layer and layer height in the slicer, or the layer numbers won't match.
Add the change in the slicer
- Export the design (File › Export…, ⇧⌘E) as 3MF or STL and open it in the slicer.
- Slice it, and open the preview.
- Drag the layer slider to the layer from the plan.
- In Bambu Studio or OrcaSlicer, right-click the + beside the slider and choose to add a filament change. In PrusaSlicer, use the slider's "Add color change (M600)".
- Print. When the printer pauses, unload the first filament, load the second, and resume.
The same trick for hidden inserts
A pause can also embed something: a magnet, a nut or an NFC tag in a sealed pocket. The pocket's top goes on a layer boundary, with 0.2 mm of room above the insert and at least three solid layers over it. Declare the pocket tops in the design as insert_tops = [...] and pause_plan gives the layer to pause at, where you drop the insert in before the printer covers it.
Questions
- Can I print text in a different colour without a multi-material printer?
- Yes, if the text is raised above the surface. Change filament at the first layer of the letters. Text flush with the surface puts two colours on the same layer, which needs a multi-material printer or separate parts.
- Which layer do I change filament at?
- The first layer of the new colour. With a 0.2 mm first layer and 0.2 mm layers, colour that starts at 3 mm begins on layer 16. ScadBox's Print Check and pause_plan tool work it out for you.
- What if the colour change isn't on a layer boundary?
- The layer that straddles it holds both colours' shapes but can only print in one. Make the height a whole number of layers above the first layer. ScadBox's pause_plan tool warns when it isn't.
- How do I add a filament change in Bambu Studio?
- Slice the model, drag the preview's layer slider to the layer, right-click the + beside it and add a filament change. OrcaSlicer works the same way.